Showing posts with label tuesday tutorial. Show all posts

Wednesday, 27 April 2011

Tuesday Tutorial: waistband alteration, plus a bow!

Oh gosh, I swear this was a Tuesday tutorial when I started writing it, even if the post-date does say Wednesday... I adore a lot of lolita print skirts, and this Alice and the Pirates Midsummer Night's Dream skirt is totally charming. However, it also came in only one size, like many lolita brand skirts. That one size is not my size. While my waist is only a couple of inches off, that couple of inches isn't going to disappear (unless I stop eating delicious things, and that's Not Going To Happen). So this alteration is one that I've now done to a couple of different brand skirts, and it's really very easy, especially if the skirt comes with matching waist ties. It's optional to add a new partially-shirred panel - you can do it as a flat panel instead - but including the elastic gathered channel hides the added panel extremely well and also adds ease for wear. 


As a bonus, I've also added a mini tutorial for making a bow out of the leftover waist tie fabric, since matching accessories are always fun. Sadly, in doing my wee bit of hand-sewing I was getting horrible nerve twinges in my wrist and fingers, so I think it's a sign that I need to avoid hand-sewing as much as possible. Let's hope that I can keep on with machine-sewing!


The main waistband alteration tutorial is aimed at those who have around an intermediate sewing level. You should be pretty confident with making gathered-waist skirts on flat waistbands, using a seam ripper, and optionally, with putting in a partial panel of elastic shirring.


The mini bow tutorial is aimed at those who have around a beginner to intermediate sewing level. You don't need to be hugely confident, and could probably even make this by hand if you don't have a sewing machine, but tools like sharp sewing scissors, an iron, deft fingers and some skill at hand sewing are probably useful.


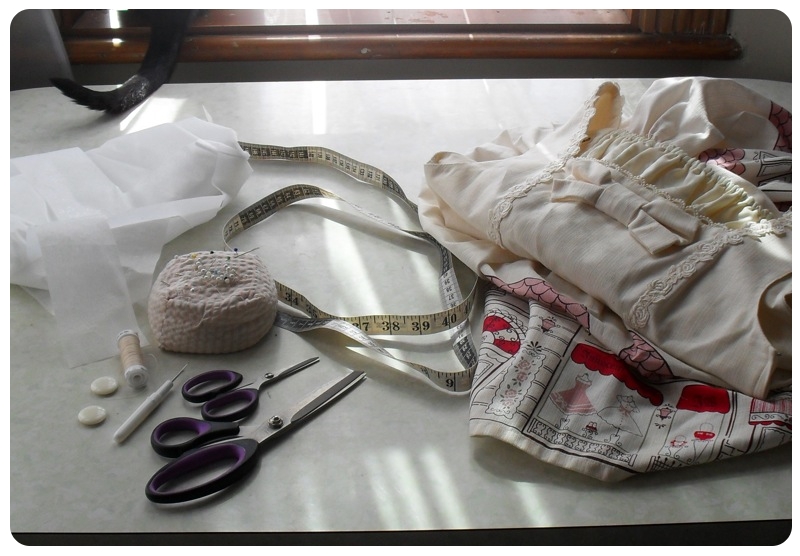
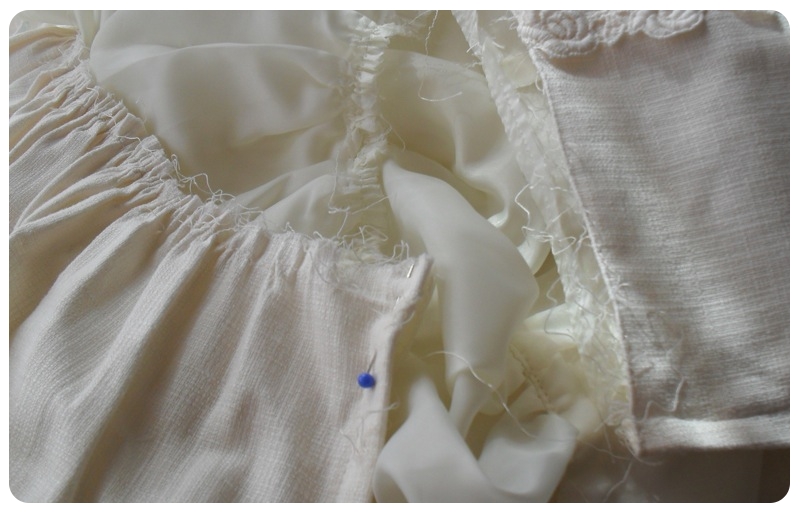
Let's start with the alterations! The first step is to unpick the waistband from the skirt. The fabric on the left is the waist tie I'll be using to add a panel - if your skirt doesn't have waist ties, then you'll need to find some matching (or matching-ish) fabric for the extra panel insert. If it's going to be impossible to match, you can do what I did for the ETC skirt I'm wearing in this post and simply make an entirely new waistband, but in that case, this tutorial isn't necessary :D


I haven't shown the entire process in pictures, but once your waistband is unpicked, press it all flat to remove any creases from an old shirring panel. Decide how long you'll need your new waistband, and divide that measurement in half - this will be the front of the waistband. Mark the side-seam point on the band using a pin or tailor's chalk. For example, if you want to make a new waistband to fit 30", measure 15" from the end of the waistband which has the buttonhole, and make a mark at that point.

Measure from your marked point to about an inch from the other end of the waistband. We're leaving an inch because you'll need overlap for the button or hook-and-slide fastening. Find the centre of that length, and cut the waistband vertically at that centre point. For example, if the remaining length (less one inch) of the band is 12", cut it vertically at the 6" point.

Re-space your waistband and measure how much of a panel you will need to insert. Remember that you'll need to give at least 0.25" on each edge for seam allowance, probably a little more (your mileage will vary depending on how comfortable you are with small seams). If you're doing a flat panel here, then you'll just need to measure the extra width needed plus seam allowance. If you want to add elastic, then add another two inches or so for shirring.


Here's my panel all cut out - for the height measurement, open out the existing waistband and measure the width.

Pin your new panel in place, then sew it and press the seams open. I haven't interfaced this panel because the elastic I'm adding will give enough stiffness, but if you want it as a flat panel, interfacing is a good idea. This panel has now been inserted into the centre back of your waistband strip.


Re-gather the skirt to the new waistband length. It won't be quite as gathered, depending on how much extra width you've added, but most brand skirts have enough fullness to easily accommodate an alteration of a few inches.


Measure in and then sew your elastic strip into the new shirring channel, if you want a shirred panel. Everyone seems to have different ways of doing this, but my method is to fold it into the channel, sew it secure down one of the new panel seams, sew the channel closed, and then pull the elastic down to the other seam so that it can be sewn securely down that seam. I also like to add a centre line of stitching through all waistband layers, running down the elastic parallel to the gathered skirt, as this keeps the elastic even and stops it from bunching.


Once the elastic panel is secure, top-stitch the rest of the waistband again. You can either stitch in the ditch, or top-stitch very close to the gathered edge.


Here you can see that the front waistband looks basically as if it's never been touched, while the new panel in the back is also quite natural-looking and doesn't look like a home alteration. Using shirring for the added panel means that the seams for the added piece aren't that noticeable, and if your added-panel fabric doesn't quite match, shirring will help hide that too.


Once you've tied off all the loose threads, your skirt will be ready to wear :D I'm totally looking forward to wearing it tomorrow, perhaps in a slightly mori-inspired coordinate.


Using waist ties for a waistband alteration will leave you with ties that can no longer be used for a waist bow, but can easily be turned into pretty accessories. The cream grosgrain ribbon bow above is one I detached from a BtSSB dress and often wear bobby-pinned into my hair, and I wanted to make one a similar size. 

To make a similar bow, cut two rectangles of fabric - one 4" x 3.5", and one 4.5" x 3.5".


Fold your rectangles in half, right sides inside, and pin down the long edge. Sew this edge, leaving a gap in the middle (if you look at the larger rectangle, I left a gap in sewing between the two pins). You will now have two tubes of fabric, which have a hole in the long seam. Roll the tubes so that this seam runs down the centre of the rectangle, then press flat. Pin and sew the side seams closed. Turn your rectangles inside out through the hole you left in the first seam, and press flat. You can slipstitch the holes in the long seam closed if you like, but they basically get hidden once it's turned into a bow, so I didn't bother (because I am Lazy Like A Lazy Thing).


Cut another strip of fabric 3.5" long and 2" wide. Fold the long edges in about 0.5" on each side and press. Pinch your rectangles in the centre, and wrap your strip of fabric around it until you have a pretty bow. Fold in the raw edge of the centre strip, then fold again and pin it into the back of the bow. Hand-sew your bow secure. 

You can just bobby-pin this into your hair, attach a hairclip, or even sew on a brooch pin and wear this little bow as a cute brooch or bowtie, but I had a spare headband so I decided to make it into a cute, subtle side-bow.


I don't tend to wear matching hair accessories anymore, but I think this is subtle enough that I'll have fun coordinating it. Making a headbow is very easy - you simply have to cut and sew a tube of fabric long enough to cover your headband, then slide in the plastic band, fold and sew up the raw edges at the bottom, and sew the bow on in place. 

Good luck with the tutorial! If you have any questions, please do ask and I'll do my best to explain. :)

Tuesday, 22 March 2011

Tuesday Tutorial: heart rosette brooch

I've been wanting more sweet accessories, especially brooches and hair accessories, and since receiving a rosette at work (my team won the trivia quiz and got a shiny yellow rosette AND a trophy!) I've been a wee bit obsessed with rosette-style brooches. While this is on a brooch pin backing, I suspect I'm also going to play with pinning it into my hair (maybe on a headband).


This tutorial is aimed at those who have around a beginner to intermediate sewing level. You might find some fiddly things like gathering lace a bit tough if you're 100% new to sewing, but other than that it's a fairly straightforward project. If you don't have a machine, you could probably even sew the whole thing by hand, but I don't really recommend it because your wrists might break. (I used to do a lot of hand sewing, and I now struggle with wrist pain. It's really not good for you.) Protip: you can also use the 'making a lace-trimmed heart' side of this to make slightly larger hearts for a heart-pocket skirt like this. (Oy, that's a lot of sweet right there.)


As always, click the pictures for a larger view!


Things you will need: fabric, ribbon, lace, iron-on interfacing, trimmy bits (that's a jug full of glass pearls in varying sizes), a sew-on brooch pin backing, and a heart template. I do have a pattern envelope of them, yes :D I also have an iron-on applique left over from other projects. Not shown: thread and an iron, because you can't iron-on anything without one.


Draw yourself up a heart template and cut out your fabric (two pieces, one for the front and one for the back). Remember to include seam allowance when making your template! It's a good idea if using a patterned fabric to try and get the pattern centered prettily, though the back isn't as important. Those heart templates are actually slightly larger than the one I used here - they're for the aforementioned heart pockets.

Cut out the same again in iron-on interfacing and iron it onto the back of your fabric pieces.


Put a gathering/basting stitch along your lace (it has a raw edge because it was pre-gathered onto a wider band which I cut off since I wanted it a bit narrower). You'll need a strip of lace about twice the length of your heart outline.


Gather your lace, then pin, baste and press it along the edge of the front heart piece, with the right side of the lace facing down and in towards the heart. This is a bloody fiddly bit, especially if you're machine-basting, so you might want to hand-baste it instead since you have a bit more control that way.


Pin the back heart piece to the front piece, then sew them together using your lace basting stitches as a sewing guide. Leave a wee gap along one of the straight sides so you can turn it right-side-out in a few minutes.


Trim the edge, notching around the curves. Notching into the curve is really important to get a smooth curve, so remember to use it whenever you're sewing a curve (such as on a scalloped hem). Make sure not to snip into your stitching, because I've done it before and it's a fucking hassle to fix.


Turn it right-side-out and wrangle it into shape (a bit of pressing and tugging to make the heart sit correctly is always useful here). Top-stitch around the edge of the fabric to sew up the hole on the side. Cut two pieces of ribbon to length (I didn't really measure, just held it up and decided how long I wanted them to be), clip the ends by folding the ribbon in half and then cutting diagonally, and pin them in place on the back of the heart. It's best if you fold over the edge of the ribbon a couple of times to avoid fraying edges. Sew in place.


Sew your brooch backing pin onto the back, then add any embellishments on the front such as glass pearls or crystals. If I had tiny pink Swarovski crystals I probably would have added them for a bit of glitter, but pearls are pretty too.


Now your rosette is done! Pin to a pretty sweater or cardigan, or add to a plain blouse for a bit of lolita sweetness. My flatmate's a bit meh over super-sweet accessories like this, but she said that it "looks like you've been given the Prize for Cute!" 


This is another rosette without lace, using my leftover iron-on applique. I have plans for a grey wool houndstooth blazer and pencil skirt, and I think that pinning it to the lapel will give a very pleasantly twee lolita-school-uniform vibe. Ribbon rosette <3.

Tuesday, 15 March 2011

Tuesday Tutorial: dress to skirt alteration

This marks the first of what will hopefully be a regular series: Tuesday Tutorial. Not all posts will be as huge and in-depth as this one, and it probably won't be every Tuesday because a lot of what I make takes a bit longer to make, but I'd like to start posting regular tutorials showcasing various sewing techniques for a variety of skills. AND doing a regular tutorial encourages me to actually keep sewing regularly, which is always a bonus.

Over the weekend I pulled out this Innocent World dress which I'd begun altering last year before moving house. I've started preferring skirts to dresses, since they're a bit more versatile and easier to dress up for work, so since I love the print of this dress, I'd decided to turn it into a skirt with a wide waistband for a bit of a high-waist effect. I probably could have sold the dress and bought the IW skirt instead, but given that it's not super rare, I like the cream colourway and I had the dress in my seam-ripper-happy hands, there was no reason for me not to alter it. Plus I've taken photos so y'all get to see shot-by-shot details of how to do something similar! 

This tutorial is aimed at those who have around an intermediate sewing level. You don't have to be super-amazing, but you should be pretty confident with making gathered-waist skirts on flat waistbands, using a seam ripper, and with using limited fabric supplies to construct things like a new waistband. If you're not hugely confident with these skills, I've tried to make instructions as clear as possible, but you might find things a little tougher. Protip: you can also use this tutorial to resize a skirt, although I intend to post another photo tutorial with details on resizing a waistband using waist ties or a new piece of fabric.

As always, click the pictures for a larger view!


What you will need! On the top is iron-on interfacing, pins, matching thread, buttons (or hook and slide-bar fastenings), a seam ripper, large and small sewing scissors (you can just have a large pair but I keep a small pair next to my machine for snipping threads), a tape measure, and a dress to alter. Plus a bonus cat tail, but this is actually neither necessary nor useful, my cat just likes to be included. Below is an ironing board and iron; this is SUPER necessary as you'll need to press your unpicked pieces and iron on the interfacing, and pressing as you go is one of my most recommended ways to keep your sewing looking good. Plus a bonus background of my teeny fabric/patterns storage and inspiration board. I recently moved house into a much smaller bedroom (honestly about half the size) and while setting up my sewing area was tricky, I'm quite pleased with the amount of usable room I've wound up with.


The first step: unpick the skirt from the bodice along the waist seam. This might take a wee while depending on how the dress is constructed and how many seams there are, but generally take care with what you're doing and avoid ripping the raw edge of the skirt, as unless you specifically want to shorten the skirt, the top edge needs to be kept nice and tidy for re-gathering onto the waistband later. When you reach the zip, use your scissors to snip it across even with the top of the skirt raw edge, and put a pin in to stop yourself pulling the zipper up and off the tape (I have done this before, and it is fucking irritating as getting the thing back on is basically impossible and part of the joy of this alteration is not having to put in your own zip).


Press the top of the skirt flat to get rid of the old gather creases. Using a basting stitch, sew a seam inside the seam allowance (I usually line up the edge of the fabric with the edge of my foot), sewing the lining to the skirt outer if the skirt is lined. Stop sewing, pull out a good end of thread and snip when you reach the side seam, then sew the same again. This basting stitch will act as your gathering thread, and I find it's easier to gather the front and back of the skirt separately so I leave a long thread in the middle ready to pull.


You should now have a wide, flat tube of skirt, plus a bodice unpicked at the waist. Set aside the skirt for now, because we're going to unpick the bodice and that's a bit of a bitch.


Now we have a pile of bodice pieces, plus some trim. I'm a bit of a hoarder when it comes to nice things, so I unpicked all of the trims really carefully and put them aside to use as I could.


Cut out pieces to put together the waistband, and don't forget that you need about an inch extra at one end to provide the overlap for a button or hook/slide fastening. In constructing the waistband, it gets a bit tricky because how you construct it really does depend on the shape of the pieces of your specific bodice. If you've got a lot of long, narrow bits you might have to play around a bit with Frankensteining them together. I was super lucky because the bows on the front of the dress unfolded into really nice large rectangles of fabric, which combined with the large (originally shirred) back panel of the dress was enough to do a wide waistband which folded over to provide the backing, rather than needing a seam at the top. 

If you have waist ties that you don't mind using, they will be SUPER EXCELLENT as they're a long, wide piece of fabric from which it should be fairly easy to cut out a waistband; I'm usually a bit 'meh' over waist ties and don't mind using them at all, but the ones that come with this dress are gorgeous and have a lovely scalloped edge, so I couldn't bring myself to cut them up (though halfway through unpicking the bodice, which was patterned and put together incredibly well, thanks IW, but golly it was a pain to unpick... I did wind up looking wistfully at the long expanse of waist tie and calculating whether I could use them and still save the scallops). If you're using waist ties, I'd probably recommend ignoring unpicking the bodice unless you want to nick the trim for later use or you want extra fabric for accessories like hairbows.


Trim your waistband strip evenly along all edges, then add iron-on interfacing to the reverse side. If you want a particularly stiff waistband (good if you're making a high-waisted style) and your fabric's a bit floppy/lightweight, you might want to use a heavier-weight interfacing. This fabric is naturally quite stiff (hurr hurr) which I was pleased by as it holds up well to a wide waistband without creasing.


Using pins, mark the centre front, side and centre back of your waistband. In this picture you can also see how I've Frankensteined my panels of fabric together for a waistband. In general, if you're working with panels of fabric that need sewing together to make a whole strip, try as much as possible to place your seams symmetrically and in places that won't look too odd, and if you have trim, try using it in the seams to make them look a bit more intentional. This scalloped lace was taken from the top neckline, and this is the entire piece I had - it looks odd at the moment because it finishes halfway up, but once the waistband is folded over it all works out.


GATHERING TIME. Check out those goddamn gathers. This is something I also can't really teach via tutorial - learning how to gather fabric quickly and evenly is something that you'll pick up with experience. But try to line up the edge of the gathers with the edge of the waistband, and use as many pins as you need to keep the gathers wrangled in place. Then when you're sewing, go slowly and carefully and FINGERS CROSSED avoid stabbing yourself with pins. Sewing in gathers is always when I seem to do it and it fucking hurts. Plus then you run the risk of bleeding all over your fabric, and that's generally unpleasant and irritating. So yes. Slow and careful is the motto.


Look, it's beginning to look like a skirt! This is post-gathering but pre-folding-down-the-waistband. Press your waistband up and the gathering seam up towards the waistband too, so that when you fold down the back, you can enclose the raw edge inside the band. Here you can see my front lace detailing a bit more, plus just how wide the unfolded waistband really is (around 6" unfolded).


Fold in the seam allowance along the remaining raw edge of the waistband, then fold the whole thing down and pin/sew the inside in place along the gathered edge (just like you would when constructing a skirt normally). I forgot to take a photo of it pinned in place, but this is post-sewing. You can either stitch 'in the ditch' between the waistband and the gathered skirt, or top-stitch along the edge of the waistband. I prefer to top-stitch both along the bottom edge and the top fold, since it gives the top edge some extra structure and also makes it look a bit more professional. I've also added a line of rose galloon lace along the bottom edge of the waistband for some extra detail and interest, and because I'm a bit of a perfectionist I sewed back in the Innocent World tag before sewing down the waistband.


Add your fastenings - I've used two cream buttons since I had them, but if you prefer you can sew in a hook and slide or two. If you're going to keep using your waist ties, sew back on the buttons on each side of the waistband (I am actually SUPER LAZY and haven't done this yet; I probably won't until I actually want a bow which might be some time away). Tie and trim off any loose threads, and you're FINISHED. WOO HOO.


WOOO HOOO.